how to post larger image in blogger

1.First, calculate
how much image size(large) you want to display ( normally, its just a bit less
than your main body width). Suppose, take this blog as an example, the main body
width is about 570px. So, the maximum width to post a large image is 570px. But,
to make the image looks nice, we have to give some padding to it.so,choose the
width which is a bit less than the post body width.. like 560px.


Now, Go to Layout » Edit html


Find this


]]></b:skin>


Add this before that line:


img {

max-width: 560px;

width: expression(this.width > 560 ?
560: true);

}


Change the value in red depending on the previous step.


Note: Do check if you have the
img{ tag already in your template. If
its there, just add the additional couple of lines to it.


max-width: 560px;

width: expression(this.width > 560 ?
560: true);


Save the changes.


2. Now, while doing your posts, upload
the images normally like you did previously. Once the image is uploaded, go to
Edit html tab, and the image code will look something like this


<a onblur="try {parent.deselectBloggerImageGracefully();} catch(e) {}" href="https://blogger.googleusercontent.com/img/b/R29vZ2xl/AVvXsEjnN4OQnYScWSApr6MuPX9gMS7D_wW9nyoAvT0mp73BaD5fp-B03xzxswe-NWSXs5PdcJMIxaVdRBtIAi_O9vngjx8800zwmFQd5772jOYwZieA9oLSaBqNPujfhQuetPpnyMmEFegBco2M/s1600-h/megan+fox.jpg"><img
style="margin: 0px auto 10px; display: block; text-align: center; cursor:
pointer; width: 280px; height: 400px;"
src="https://blogger.googleusercontent.com/img/b/R29vZ2xl/AVvXsEjnN4OQnYScWSApr6MuPX9gMS7D_wW9nyoAvT0mp73BaD5fp-B03xzxswe-NWSXs5PdcJMIxaVdRBtIAi_O9vngjx8800zwmFQd5772jOYwZieA9oLSaBqNPujfhQuetPpnyMmEFegBco2M/s400/megan+fox.jpg"
alt="Normal Picture without the hack" id="BLOGGER_PHOTO_ID_5350218059319919970"
border="0" /></a>


All you have to do is Just remove that bolded text (width and height attributes)
and replace s400 to s800.


So, the final code looks like this


<a onblur="try {parent.deselectBloggerImageGracefully();} catch(e) {}" href="https://blogger.googleusercontent.com/img/b/R29vZ2xl/AVvXsEjnN4OQnYScWSApr6MuPX9gMS7D_wW9nyoAvT0mp73BaD5fp-B03xzxswe-NWSXs5PdcJMIxaVdRBtIAi_O9vngjx8800zwmFQd5772jOYwZieA9oLSaBqNPujfhQuetPpnyMmEFegBco2M/s1600-h/megan+fox.jpg"><img
style="margin: 0px auto 10px; display: block; text-align: center; cursor:
pointer;" src="https://blogger.googleusercontent.com/img/b/R29vZ2xl/AVvXsEjnN4OQnYScWSApr6MuPX9gMS7D_wW9nyoAvT0mp73BaD5fp-B03xzxswe-NWSXs5PdcJMIxaVdRBtIAi_O9vngjx8800zwmFQd5772jOYwZieA9oLSaBqNPujfhQuetPpnyMmEFegBco2M/s800/megan+fox.jpg"
alt="Normal Picture without the hack" id="BLOGGER_PHOTO_ID_5350218059319919970"
border="0" /></a>


Done! Now, your uploaded image will look big in the post.


  • Digg
  • Del.icio.us
  • StumbleUpon
  • Reddit
  • Twitter
  • RSS

Photoshop design filter ripple effect in photoshop

Photoshop design filter ripple effect in photoshop


Posted on August 17th, 2008 by 3dfun in Photoshop Tutorials


Here we will tell you how to make a Photoshop design filter ripple effect in
photoshop.


[1] Take a new file of 400 pixels, 400 pixels, of resolution 72 dpi in the
RGB mode.


[2] Fill the background with #073745.


Photoshop-design-filter-ripple-effect1


[3] Go to Filter>Render>Lighting Effect apply the following
settings.


Photoshop-design-filter-ripple-effect2


[4] After that duplicate a background layer press cntl+t, minimize your layer
like this.


Photoshop-design-filter-ripple-effect3


[5] Go to Fitler>Distort>Ripple apply the following settings.


Photoshop-design-filter-ripple-effect4


[6] Then go to Filter>Distort>Glass apply the following settings.


Photoshop-design-filter-ripple-effect5


[7] You get something like this.


Photoshop-design-filter-ripple-effect6


[8] And now change the Blending Mode to Screen.


Photoshop-design-filter-ripple-effect7


[9] Choose Eraser to and set properties like this.


Photoshop-design-filter-ripple-effect8


[10] Now Erase the some area like this.


Photoshop-design-filter-ripple-effect9


[11] Take the Text Tool create a sign.


Photoshop-design-filter-ripple-effect10


[12] Double click the layer to open layer style window. Apply settings as
shown.


Photoshop-design-filter-ripple-effect11


Photoshop-design-filter-ripple-effect12


[13] Dupliacte that layer cntl+t right click and select Flip Vertical.


Photoshop-design-filter-ripple-effect13


[14] Now select duplicate layer right click and select Rasterize Type.


Photoshop-design-filter-ripple-effect14


[15] Go to Filter>Distort>Ripple apply the following settings.


Photoshop-design-filter-ripple-effect15


[16] Change the Opacity 40% and Fill 85%.


Photoshop-design-filter-ripple-effect16


Photoshop-design-filter-ripple-effect17


[17] Dupliacte the background layer and change the Blending Option “Soft
Light” arrange the layer aslo see in the next image.


Photoshop-design-filter-ripple-effect18


[18] Done!!!


Photoshop-design-filter-ripple-effect19


animated gif photoshop cs3


animated gif using photoshop


animated photoshop


  • Digg
  • Del.icio.us
  • StumbleUpon
  • Reddit
  • Twitter
  • RSS

Easy Abstract Photoshop Tutorial

Easy Abstract Photoshop Tutorial


This tutorial will show how to create a very simple abstract shape using a
few brushes and effects. For this tutorial I will be using Adobe Photoshop CS3.
If you have an older version of Adobe Photoshop, you may still be able to follow
this tutorial.


Keep in mind that it would be nearly impossible to duplicate this exact
object, but this tutorial should give a guide to creating your own unique
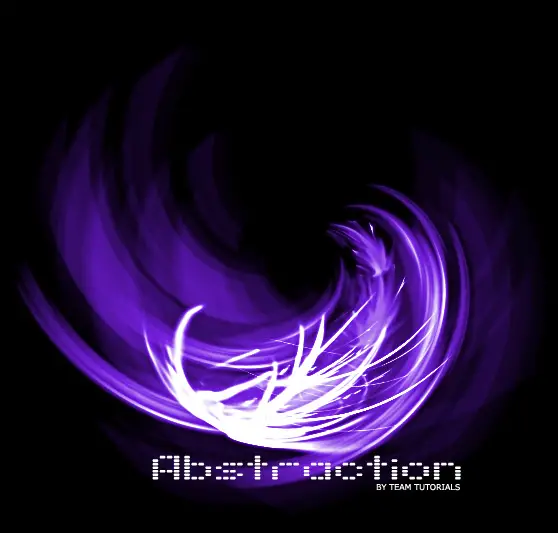
object. You should end up with something like this.

adobe photoshop abstract tutorial


The first thing we need to do is download the brush set for this tutorial. You can download the
free Trance Brushes from Brusheezy.com by clicking here..


After you download the brushes, extract the .abr file from the .zip and save
it.
adobe photoshop abstract tutorial


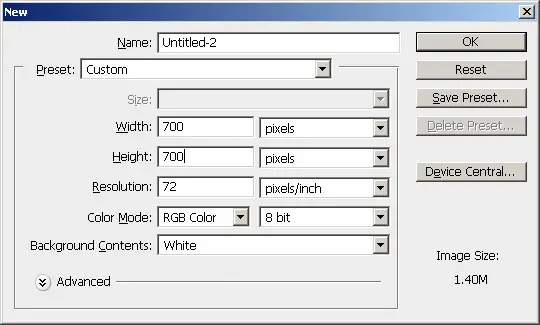
Open Adobe Photoshop and create a new document 700×700.
adobe photoshop abstract tutorial


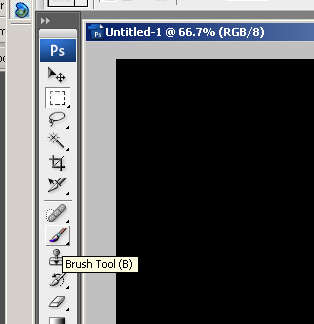
Fill the background layer with black (#000000) and select the brush
tool.
adobe photoshop abstract tutorial


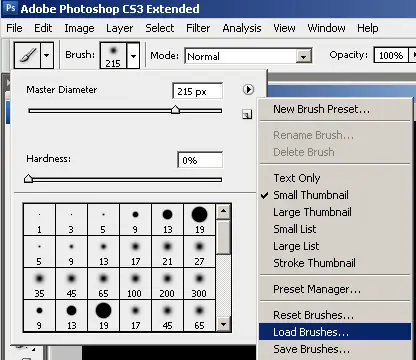
Load the brush set that you just downloaded by clicking the drop down next to
the brush > the arrow point right > then the load option.

adobe photoshop abstract tutorial


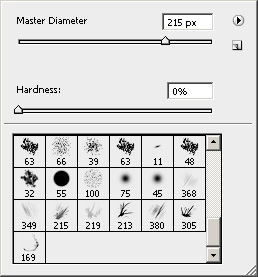
Select the Trance Brushes and load them. You will see the new brushes appear
at the bottom of the brush set.

adobe photoshop abstract tutorial


Reset the color swatches so that white is the foreground color and black is
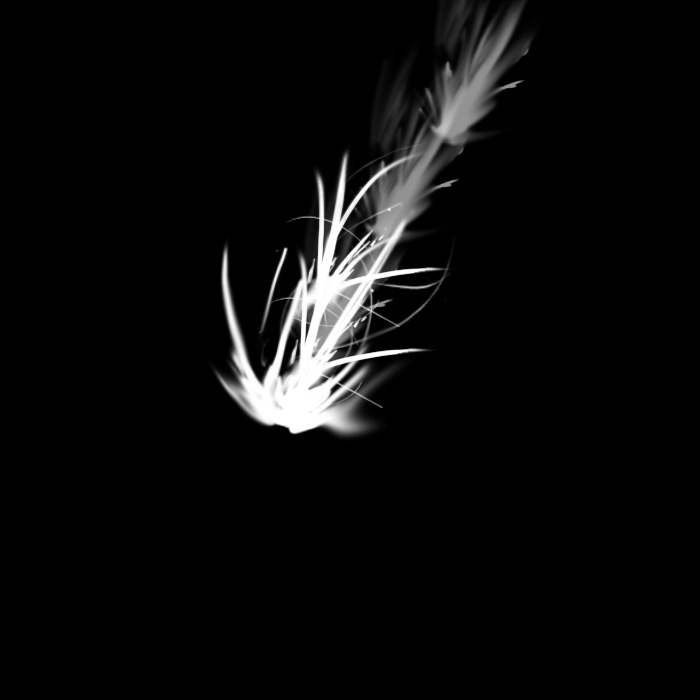
the background color. Create a new layer and use some of the brushes to create
an abstract shape. When you are painting with these brushes, do not drag the
mouse like you normally would. Instead click once to create the shape. There is
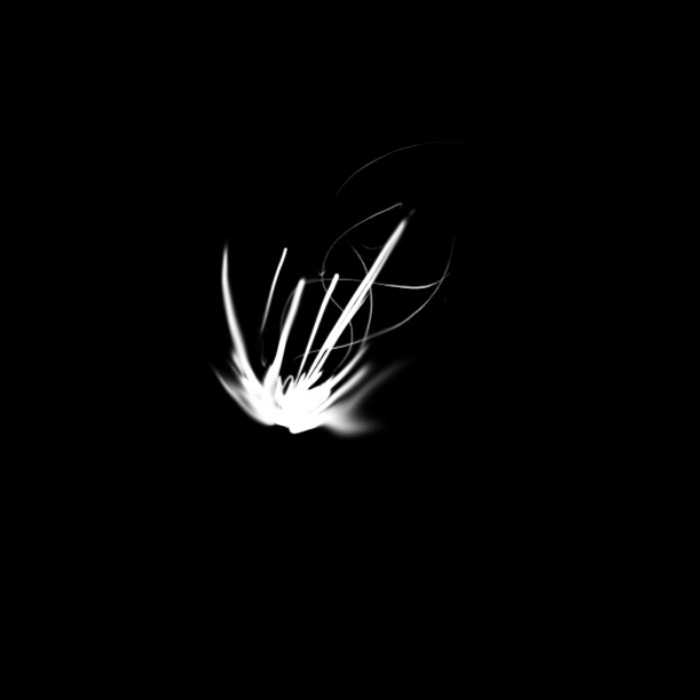
really no science to this. First I will use brush 305 to create this.

adobe photoshop abstract tutorial


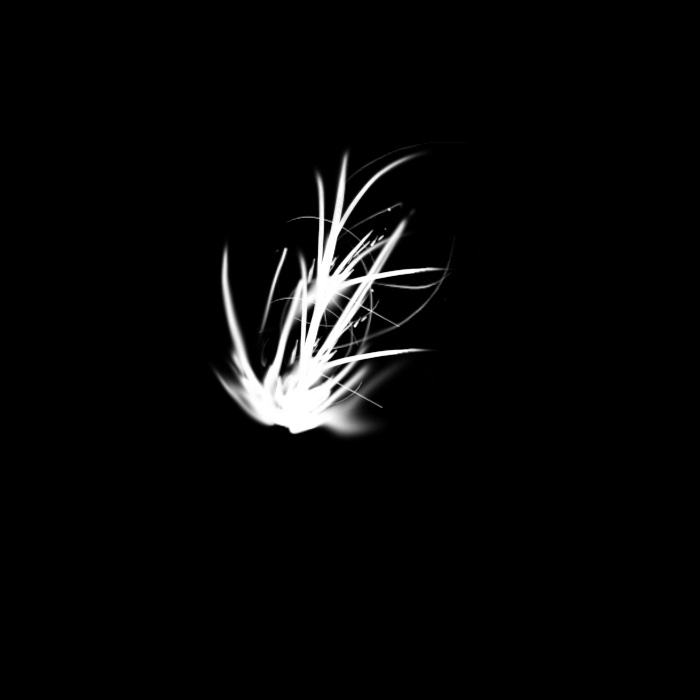
Next I will add a few more with #213.

adobe photoshop abstract tutorial


Then I will use 215 to make a tail.

adobe photoshop abstract tutorial


To complete this shape I will dab a couple times with the brushe that is
numbered 380 for me.

<img src=‘ />


Like I said before, there is no set way to do this, just come up with a shape
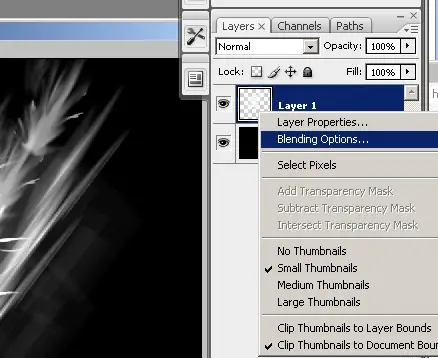
you like. Now to add a little bit of color I will apple a purple glow. Right
click on the layer in the layers pallet and select blending options.

adobe photoshop abstract tutorial


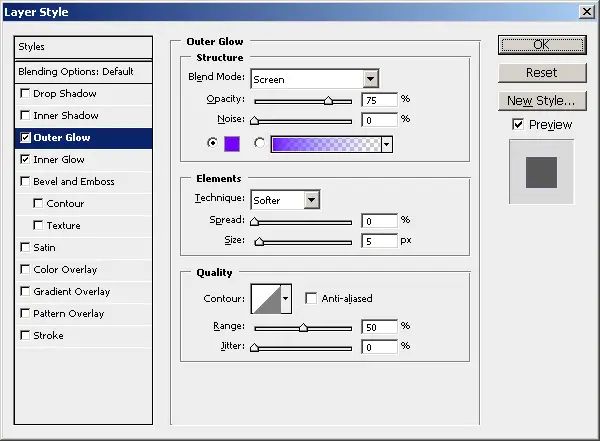
Apply an outer glow using the color #7200ff.

Easy Abstract Photoshop Tutorial


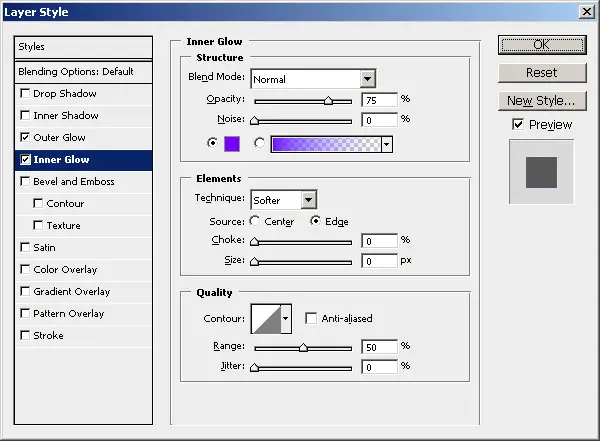
I also added an inner glow using the same color #7200ff.

Easy Abstract Photoshop Tutorial


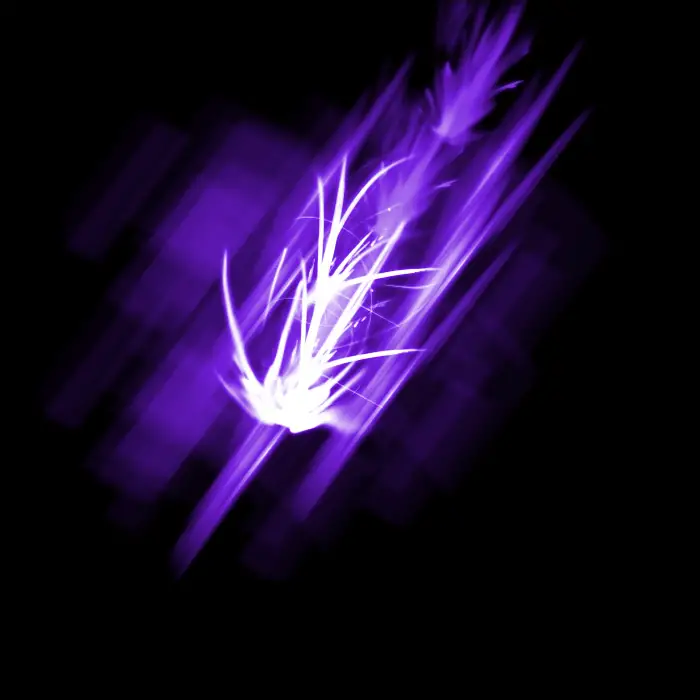
Apply the changes and you should get something like this.

Easy Abstract Photoshop Tutorial


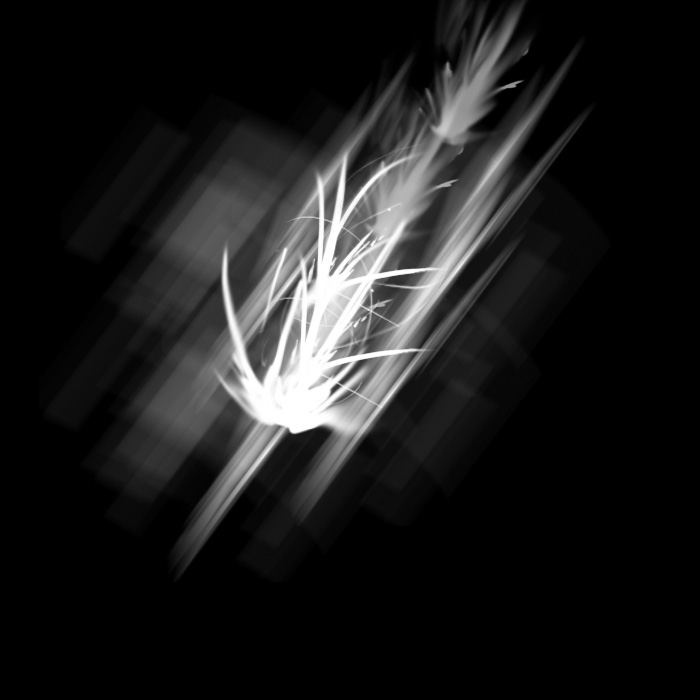
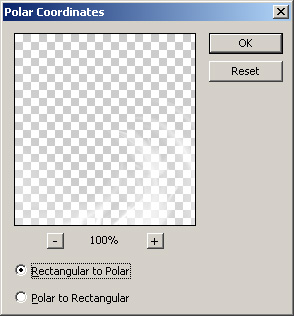
Now we are going to distort the image using the polar coordinate filter.
Click Filter > Distort > Polar coordinates.
Easy Abstract Photoshop Tutorial


Make sure that Rectangular to Polar is selected and click ok

Easy Abstract Photoshop Tutorial


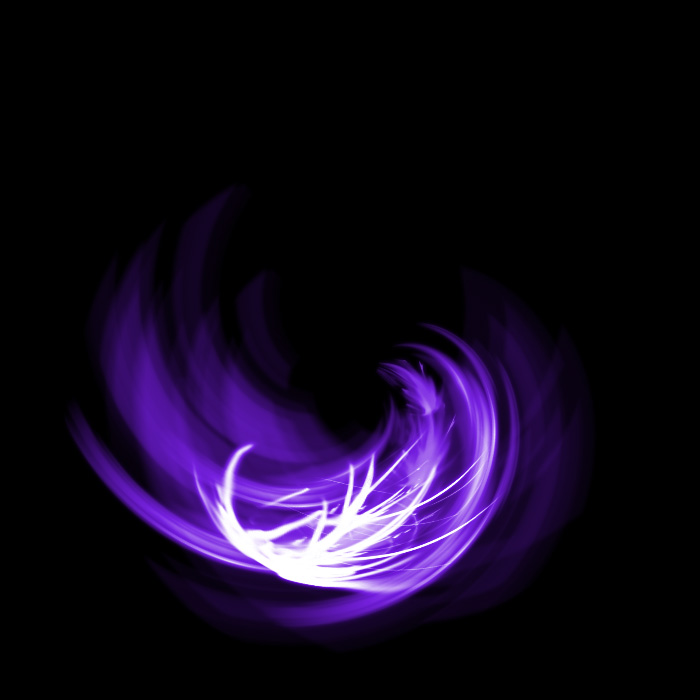
You will get something like this.

Easy Abstract Photoshop Tutorial


Where the object is located on the canvas will effect how it is distorted. If
you do not like the way it came out, undo the filter and move the object. Then
try to apply the filter again. Mine looks ok, but I think it is a little blurry.


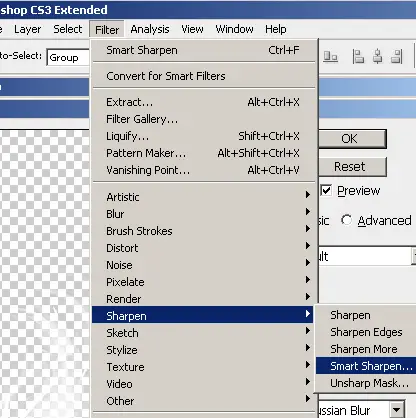
I am going to apply the Smart Sharpen filter to sharpen up the image. Click
Filter > Sharpen > Smart Sharpen.

Easy Abstract Photoshop Tutorial


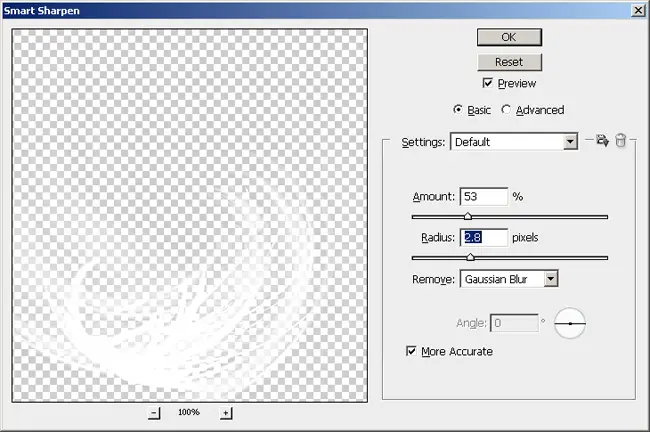
You will have to play with the settings to see what looks the best for you,
or you could skip this step completely. Here is what I used.

Easy Abstract Photoshop Tutorial


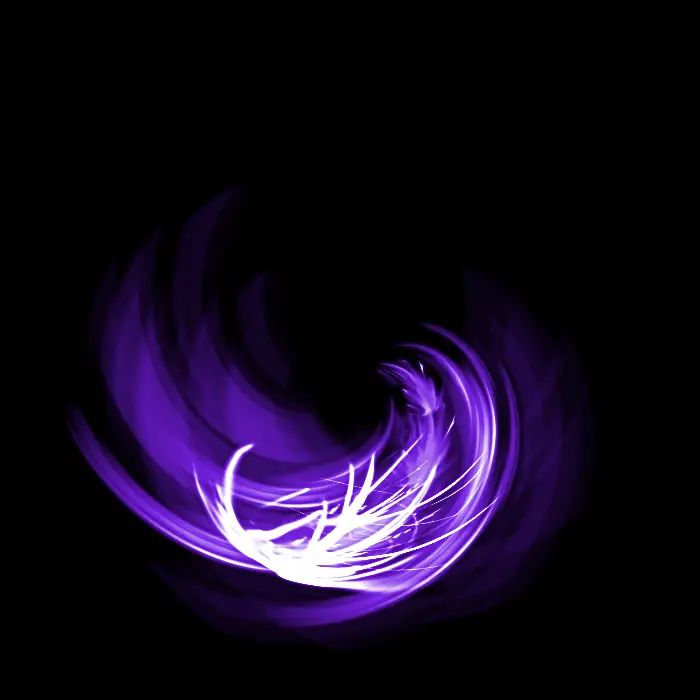
This is what my image looks like now.

Easy Abstract Photoshop Tutorial


That is all it takes to create a simple abstract shape using brushes. If you
do a search online you can some great free brushes to play around with. You
could also add some text to this and make into a background or
something.

adobe photoshop abstract tutorial


Popularity: 93% [


  • Digg
  • Del.icio.us
  • StumbleUpon
  • Reddit
  • Twitter
  • RSS

How Do i Can Create Water Shade

In this tutorial we will use Adobe Photoshop to create some water.


Firstly create a new document - Im using 400px by 300px for this tutorial
however you ca of course use whatever size you want.


Create a new layer and call it "water". Now press Ctrl + A to select everything.
Using the paint bucket tool fill it with #3655B1.


External Image


Now we want to use some filters on our image to actually make it look like
water. Go to Filter >> Noise >> Add Noise. Set the amount to 13% and click OK.


External Image


Now go to Filter >> Blur >> Motion Blur. Use the following settings:


External Image


Now go to Filter >> Sketch >> Bas Relief and use the following settings:


External Image


Only one more thing to do now. Add another motion blur like we done before
however this time set the distance to 15.


Heres my final result:


External Image

  • Digg
  • Del.icio.us
  • StumbleUpon
  • Reddit
  • Twitter
  • RSS